Monday, February 11, 2019

Mt Diablo 2-6-19

It was Wednesday, and when I left my painting class around noon, there was blue sky and sun and it felt like a good chance to go for a hike after all of the rainy weather that we have been having. Now that Darby is no longer with us, I haven't been going out so much, although I still try to fit in some kind of walk every day. For many years we avoided hiking on Mt. Diablo because dogs aren't allowed on the trails, but that is no longer a concern. I thought about where to go on the mountain, and remembered that I had never been on the Mary Bowerman Trail which is a short loop around the very summit. I had known about it since its creation in the late 70s, but always thought that it would be too short to bother with.

There had been snow in the higher bay area hills on Monday night, and there would probably be some on the mountain, but I didn't really care about that. We had spent the previous weekend in a cabin on highway 4 above Arnold, and had nearly a foot of snow come down while we were there. That was enough to satisfy me for a while. Then as I drove toward Danville, I saw that there were only a few little patches of snow showing on that side of the mountain, so I didn't expect to see much.

At the South Gate, the woman at the kiosk informed me that the road was closed at Juniper Camp because of ice on the road. I drove on up, thinking that I could hike to the summit from there. When I got to Juniper, the fairly large parking area was full. I wasn't expecting crowds, but here they were. I found a wide spot to park back down the road a ways. As I started up the trail toward the summit, there was a few inches of snow in the shady areas under the trees. There were lots of people coming and going, including lots of families with small kids. As I got higher up the hillside, the crowds thinned. The afternoon sun on the snow was pretty, and many chaparral shrubs had lacy patterns of snow on their branches. There were a few spots where the trail had become dangerously icy, and it was hard to keep from slipping.

On the trail above Juniper Camp
I remembered the trail from Juniper Camp to the summit as being fairly easy, but I guess I'm not in such good shape anymore, and I was already getting pretty tired from the climb. Where the trail crosses the road near the big microwave tower, I stopped to reconsider my plan. I still had a bit more climbing to do and it was getting late in the day. I decided to just walk back down the road. It would be a longer distance but much easier walking. It was quite enjoyable walking down without worrying about the mud and ice of the trail, and looking out at the expansive views. There on the south slope of the mountain, there was very little snow, and none on the road. It was also nice to be on the road with no cars.

On the road heading back down
So the Mary Bowerman Trail will have to wait for another time. It was a nice afternoon anyway with a good walk in pretty surroundings and great views.

approximately 2.5 miles, 700 ft. climb


Saturday, February 9, 2019

Map Design -- Rock Drawing

In a previous blog post (map design -- May 20, 2016), I mentioned the work that I had done in attempting to imitate the rock drawing style of Swiss topo maps. In the couple of years since then, I worked on a much larger project — a topographic map with rock drawing covering the entire area of the High Sierra. Several months after I had put that project aside, I realized that it might be worthwhile to write a few notes about how I went about creating the maps before it faded from my memory. So that's what this blog post is all about. I'm going to start with explaining how I made the maps shown at the end of my previous post, and then how I made the later High Sierra map.

First attempts at rock drawing

I chose to start with an attempt to map the area of the USGS 7.5’ Mount Ritter Quadrangle. I was familiar with the area and felt that it would be representative of much of the High Sierra terrain. I mostly just wanted to see what I could do with rock drawing, so my plan was to just overlay the drawing on the existing topo map. I first tried drawing lines in Adobe Illustrator following ridgelines and edges, thinking that some skeletal lines would be enough but it wasn't. Then I tried drawing in pencil on tracing paper. The result wasn’t too bad, but it was not easy. I couldn’t see the countours clearly through the tracing paper and the pencil tended to smudge. Attempts at erasing made a mess. After scanning, many areas of the drawing were too weak. I fit the drawings as an overlay on the topo map. I added a layer of shading derived from USGS dem data using software called SimpleDEMViewer. On the topo, the blue contour lines on the glaciers were much too dense. I replaced them with drawings done in Illustrator using the same contour interval as the rest of the map. It all turned out all right, but I thought that I could do better.

pencil on tracing paper overlaid on topo
I had been getting help from a pdf I found online entitled “Design Principles for Swiss-Style Rock Drawing” by Bernhard Jenny and others. I found that it pointed me in the right direction, but found it difficult to apply the style to real terrain in the High Sierra. The peaks and cliffs weren’t so hard to draw, but the lower slopes tended to look like random scratchings. From the countours it was hard to tell where rock drawing was appropriate. I tried using satellite photos and they helped a lot, but not entirely. Did moderately steep contours indicate rock slabs or talus slopes? I found that looking at satellite photos from multiple sources helped. In many places, the satellite photos on Google maps showed lots of snow cover which didn’t help in drawing the rocks. Photos from Terraserver from different times of day and different seasons often gave a better view.

I decided to try again, this time on a different area, the 15’ Matterhorn Peak quadrangle. I made a number of attempts at this, and after looking through my old files, I’m not sure exactly what I did each time. I know I used several different USGS topo maps as a base — the 1:100,000 Bridgeport quadrangle, the 1:62,500 Matterhorn Peak and the 1:24,000 Matterhorn Peak. I found the latter in two versions — one a jpeg image and a newer one that was all vector art. The vector art version was useful because I could separate the elements and use them in Adobe Illustrator, but I found that the contours were much less accurate than the older map. In some places like the cliffs of Yosemite Valley they were very inaccurate. But I used them anyway on some of my attempts because in most areas, their inaccuracy was not so obvious.

On a couple of maps I used the vector art contours but I wanted my finished map to be at a smaller scale so I changed the 40 ft. contours to 80 ft. contours by deleting every other line. I soon ran into problems because it was hard to tell where I had deleted and where I hadn’t. I solved that problem by changing the color of the lines rather than deleting them. When I was done, I could select all of the lines with changed color and delete them all at once. I also created contours from dem data using SimpleDEMViewer. The result was a bit-mapped image, but on some maps I converted it to vector art using the Live Trace feature in Illustrator.

I also found problems on all of the topo maps with the green indicating forest cover. On the bit-mapped topos it was difficult to separate the green color with Photoshop. I could easily separate the green areas from the vector art, but I didn’t think it was very accurately done. Comparing the maps with satellite photos, I saw that many of the green areas on the maps showed little or no trees in the photos. I spent a lot of time trying to re-draw the forest areas by tracing the photos.

My first step toward doing the rock drawing was to draw skeleton lines. On the topo map I traced all of the steep ridgelines and the tops and bases of cliffs, trying to simplify the terrain into a set of plane surfaces. At first I wondered if the skeletal lines alone would be enough, but soon found that they weren’t. The outlined surfaces needed to be filled with some kind of hachures to show the orientation. They needed to follow the direction of the light source, with lighter strokes for lighted surfaces and darker ones in shade.

For both the rock drawing and the shading I chose to use a light source from the west. It is more usual to use a light source from the northwest, but in the Sierra the major ridgelines tend to run northwest to southeast, and they don’t stand out as well with northwest light.

I tried several different approaches to the actual drawing. I did a couple of versions with line segments drawn in Adobe Illustrator. On one I used vertical lines for the steepest slopes and horizontal lines for the less steep, similar to the style of the Swiss topos. On another I used only vertical strokes, with dotted lines to indicate talus slopes. Both look pretty good, but because they are uniform line segments, they look rather stiff and mechanical. Then I tried drawing by hand with a fine-tipped pen, going back to the Swiss-style with both horizontal and vertical strokes. On tracing paper it was hard to see the map underneath. I tried using clear acetate, but it tended to smear and didn’t scan very well.

drawing in Illustrator -- all vertical strokes
drawn again with both vertical and horizontal strokes
Then I got the idea of printing the topo map with the image lightened by about 50% in photoshop, and drawing directly on the paper in black ink. After scanning, I used Photoshop curves to reduce the highlights by about 50% which left only the drawing showing. That worked quite well and I used that method to finish my 15’ Matterhorn Peak quadrangle and do another map at the same scale of Yosemite Valley. However, there were some problems with drawing freehand like that. One was that in order to get nice thin strokes, I needed to move my pen quickly, and my accuracy suffered. Another was that it was difficult to fix mistakes. I used white-out in places but it was messy to draw over it.

In trying to draw rocks, I soon found that contours were not enough to distinguish craggy rocks from talus or other steep slopes. I needed to study satellite photos to divide the map into areas for rock drawing, areas to indicate talus, and areas without rocks. For talus slopes, I tried using dot textures in Illustrator, but I think I ended up just stippling dots with my pen on the drawings.

On all of these maps, I needed to do a lot of image manipulation to get the various elements to fit. Elements derived from a single topo map were no problem, but the shading and contours from dem data and my rock drawings all had to be scaled, rotated and distorted in photoshop to get them into good registration.

section of final Matterhorn Peak map -- rock drawing in ink on paper
After I had finished the map of the Matterhorn Peak area, I decided to try using the same procedures to do one of Yosemite Valley. I felt like I had done pretty well on both of these maps, and put them aside for a year or so. Then I began to think again about the possibility of doing a map in a similar style of the whole High Sierra. I thought that if I used a smaller scale, like 1:100,000, I might be able to manage it. That scale would be just large enough to show the general shape of the mountains, but not a lot of fine detail, which would make the drawing easier. I intended the map to be viewed on screen rather than printed, so I would assemble it in Photoshop at 72 ppi which would keep the file at a manageable size (about 2 gb).

A map of the entire high sierra

I started by making a base map by fitting together 10 topos at the 1:100,000 scale. They were the quadrangles for Bridgeport, Excelsior Mts, Yosemite Valley, Benton Range, Shaver Lake, Bishop, Fresno, Mt Whitney, Visalia and Three Rivers. I deleted a number of 15’ quadrangle areas in the northeast and southwest that I didn’t want to bother with.

I wanted to start with the lines for lakes, streams and roads. I first considered downloading all of the 7.5’ vector art quadrangles, but realized that it would be a big job since I would need to download more than 200 files, each one would require a lot of work to extract the lines, and the lines would be much too detailed for the scale that I intended. Instead, I traced the lines from the 1:100,000 scale topos. By working in photoshop to lighten some of the image and use only the red channel, I got a gray-scale image that I could apply the auto-trace feature in Illustrator and get line work for a lot of the lakes and streams. I used a similar method on the green channel to trace the larger roads that were shown in red. In many places, my tracings were pretty good, with only a few gaps that needed to be connected and extra stuff to be deleted, but in other places, large areas had to be traced manually. Later, I went back and traced all of the trails, also done manually.

section of base map with water features, roads and trails
 Once again, I needed to map green areas to indicate forest. I felt that the green on topo maps was not accurate in many areas, and it varied from one map to another. Some of the quadrangles had no green at all. I remembered that for some previous maps I had used USGS land cover data. I pieced together screen captures from a viewer and got an image of the whole map area. After fitting it to my base map, I selected the green forest areas to use as a separate layer. Later, I decided that adding a very transparent layer of the whole land cover image improved the appearance of the map.

section of land cover map
My first step toward doing rock drawing was to do skeleton drawings for the whole area. I did these drawings as an overlay on the 15’ quadrangles that I intended to use for the final rock drawings. My plan was to do the drawings at the 1:62,500 scale and then reduce them to 1:100,000 scale on the final map. I drew lines following the contour lines for ridges and cliff edges, drawing only on areas with fairly steep contours. I refered to satellite images to distinguish steep talus from craggy rocks. This process took a long time to complete — probably several months. Looking back, I may not have needed to do these drawings as carefully as I did because when I did the actual rock drawing, I used the skeleton drawing mostly just to show where to draw rocks and where to leave blank.

section showing skeletal lines overlaid on topo map
Then I had to figure out how to do the rock drawing. I realized that drawing at a smaller scale than my previous efforts would require a little different style. I looked at examples of Swiss topos at a similar scale. I also looked at examples in Imhof’s book of smaller scale drawings. Some of them showed skeleton drawing in a nice looking style and I thought maybe that would work for me.

drawing using mostly skeletal lines
I planned to do the drawing in pen on paper like I did before. I printed sections of topo maps with skeleton drawings in blue and did test drawings in black ink on them. I tried imitating the Swiss style on some and only skeletion drawing on others. On these tests I ran into the same problems as I did on my larger scale maps. My pen strokes were not as accurate as I wanted and it was difficult to fix mistakes. Then I came up with the idea of drawing directly on the topo map in Photoshop. I could draw more precisely, I could easily see the underlying map image, and it was easy to erase and re-draw mistakes. I used the pencil tool set to a width of one pixel. Some of the lines needed to be thicker than others to indicate ridgelines and shading. To do that, I drew a single line and then traced over it slightly offset to make a thicker line. I could have reset the pen tool to a two pixel thickness, but that made it a bit too thick and mechanical looking. Double stroking the thicker lines was tedious but I felt that they gave me a better looking result. I decided not to use the skeleton drawing style that I had tried and went back to imitating the Swiss maps, using vertical strokes for cliff areas and horizontal strokes for less steep ones, with attention to light direction to add shading.

final drawing using Photoshop pencil tool
I started in the northern part of the map and worked south. It was a slow process, and when I had done maybe about a third of the area, I realized that my style had changed over time. It was looking much better than when I started. It was a bit discouraging, but I went back and re-worked many areas that I had already done in an attempt to create a uniform style. It took many months of work, but I finally finished drawing the whole map area. When the drawings were fitted to the 1:100,000 scale base map, they were reduced in size by 62.5% which softened the pixelation that showed at 72 dpi, and made the lines appear darker.

Next, I wanted to add representation of glaciers. The 15’ topos showed glaciers, but after comparing them with the 7.5’ topos, I saw that they were quite inconsistent and completely missing on some quadrangles. I ended up drawing glacier areas manually on the 15’ topos while looking at the 7.5’ topos on my iphone. I feel that my drawings are accurate enough since glaciers change from year to year anyway.

Shading and contours were done together using SimpleDEMviewer on DEM data downloaded from USGS. As before, I used shading with a light source from the west. Countours were set for 200 ft. Both shading and contours were saved as separate images, but kept together while resizing and fitting to the base maps to keep the two images in register.

All of the layers were fitted to the 1:100,000 topos, and then those were fitted to the large base map of the whole area. Quite a few areas appeared to be somewhat out of register, and they needed to be adjusted for a better fit. The transparency of the various layers was adjusted to try for the best final appearance.

Type for place names was added in Illustrator in two sections because the size of the map was too large to fit into a single file. The names were mostly copied from those on the base topo. Peak elevations were added mostly from the 15’ topos which were shown in feet, but in some cases converted from meters on the 7.5’ topos. The two series of topos don’t agree on many elevations, but I decided that it wasn’t worth worrying too much about.

section of finished map
When everything was together and looking good, I flattened the image and saved it as a jpeg, reducing a 1.83 gb file to 22.3 mb. The finished map is 146 in. x 227 in., rather big to print out on paper. Just to see what it would look like, I printed it out at half-size on 8.5x11 pages and spliced them together. It’s still rather awkward at 9.5 ft. long.

entire map area
As I was working on the map, I had in mind putting it online using some kind of software that allowed viewing the image at full size and easily scrolling from place to place. But when I was done, I was tired of it and just wanted to put it aside. I had spent a couple of years of obsessive work on it and needed to focus on other things. Now that half a year or so has passed, I can look at it again, but probably won’t do anything more for a while. Anyway, I wanted to write this explanation of what I did before it faded from memory.

Tuesday, October 16, 2018

Mt. Burdell 10-13-18


Maureen and I attended a four-day clinic in Novato with Chris Ellsworth to learn how to do ranch work on a horse. Besides basic horsemanship, it involved working with cattle every day as well as learning other skills. Maureen was there to do the work while riding our horse, Zim, and I was there just to watch and take photos. Maureen has been doing clinics like this for about five years now, and she is getting good at it. Zim is very good at it too since he spent his first 10 years or so on ranches in Wyoming and he was well trained by Chris before he sold him to us.

I find watching clinics by Chris very interesting, but on Saturday, the third day, I decided to take a break from it and go for a hike. I saw that the Mount Burdell Preserve was only a short distance from the Novato Horsemens arena, so I went to check it out. The map on the website shows several places to access the park. I chose the one at the end of San Carlos Way off of San Marin Drive.

It was a beautiful morning — clear skies and slightly cool. I started on the San Carlos Fire Road up a grassy hillside with scattered oaks. It was a steady climb, but not too steep. Soon views opened up to the southeast with a little of the bay shining in the distance. There were lots of other hikers and bicyclists on the trail. I passed a couple of water troughs at Two Brick Spring and turned left on Middle Burdell Fire Road which leveled off and headed west. I could have turned off on the Old Quarry Trail and climbed to the top of the mountain, but the climbing that I had already done was enough for today. I soon passed Hidden Lake, which was not a lake at all, but just a patch of flat grassland. I guess that after sufficient rain, it will become a lake again. Then I was winding down the west slope of the mountain to the San Andreas Fire Road and passed another park entrance. Then I was on the San Marin Fire Road heading east again.

Then the road appeared to be blocked ahead by fences and houses. There was a gap in the fences that led out to a street, but I didn't want to finish my hike on streets. The only alternative seemed to be to climb steeply to the left up along a fenceline to the top of a hill on a rough path that soon gave out and I had to work my way down a very steep grassy hillside and across a dry creek to rejoin the trail I had apparently missed. I saw a park entrance below that looked like the one I had started on, but none of the vehicles parked there were mine. I thought for a moment that my truck had been stolen, but then I figured out that my park entrance was a little further. I followed the trail up over another hill and finally found my way back to my starting point.

I could have done without that last part where I lost the trail, it was otherwise a very nice hike. Pretty country, nice views, and friendly people on the trail.

4 miles, 850 ft. climb


Saturday, September 1, 2018

Heritage Grove Trail 8-26-18

Mike in Heritage Grove
Back in 2012, I wrote a post about camping with horses at Jack Brook Horse Camp in Sam McDonald County Park near La Honda where Maureen and I rode our horses, Zach and Rio, on the Brook Trail Loop. Every year since then (except for one) we have kept up the tradition and spent 8 days camping and riding there with our friends.

The last time we rode Zach and Rio on the Brook Trail was in 2015. They had a rough time with the steep trails, especially Rio, and I got off and walked up some of the steepest parts to make it a bit easier for him. In 2016, we bought a younger horse, Zim, and since our trailer only holds 2 horses, decided to leave Zach and Rio behind. Then a friend let us borrow her horse, Belle, for the trip, so we were able to ride together. We were able to borrow Belle again last year, 2017. After that, Belle's owner got bucked off one too many times, and sold her.

This year Zach and Rio both turned 30. Over a couple of months, Rio had several bouts of colic, from which he recovered, but then just after his birthday, he got it again, and this time he wasn't recovering. He was in extreme pain for many hours, and we agreed with our vet that he should be put down. Zach had been having symptoms of nerve damage and we think he may have had a stroke. He had difficulty walking straight. And then he was grieving the loss of his best friend, Rio. He is now doing much better, but he is not in good enough shape to take camping.

We were offered the use of our friend Jodie's horse, Tea, which would have worked out well, but then Tea was found to have some neurological problems. He was treated and mostly recovered, but we decided against borrowing him and being responsible if something bad happened. So we just brought Zim to camp with us, and I let Maureen do all the riding while I relaxed in camp. Our friends Mike and Norma who we camp with also only have one horse, so on a couple of days Mike and I went hiking while Maureen and Norma went riding.

On our last day of camping, Mike and I decided to check out Heritage Grove. From the campground, we walked the Towne Fire Road to near the Sierra Club Hiker's Hut, and turned left on the Heritage Grove Trail. It wound steeply down the forested mountainside into the canyon of Alpine Creek. At the bottom, there was a nice little grove of large old-growth redwoods. From there we debated how to get back to camp. We didn't want to go back up the steep mountainside that we had come down even though it was probably the shortest distance. We considered walking down Alpine Road, but that would be too far. So we continued west across the mountainside on the Heritage Grove Trail. Luckily it was relatively level and the forest was beautiful. We turned left on the Big Tree Trail and climbed steeply up to the fire road. We were both tired and this was the hardest part of the hike. Another quarter mile or so up the road and we were back at camp, quite exhausted.

This was really a beautiful hike and I suppose it would not be very hard at all for hikers who are younger or in better shape. I would recommend it. You wouldn't need to start at the horse camp as we did, it would work just as well starting at the park headquarters or at the Heritage Grove Trailhead.

4.5 miles, 900 ft. climb


Friday, August 17, 2018

Past Sierra Adventures 2

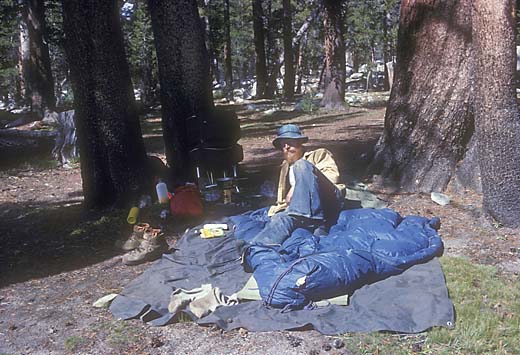
Three years after that first trip, in 1976, I wanted to do something like that again. Maureen didn’t like the idea of being left at home with a two-year-old son, but she figured that maybe if she let me go for a week long trip, I would get it out of my system. My plan was to go in mid-September, take a bus to Yosemite Valley, spend seven days crossing the range, and have my mom and dad pick me up on the east side at Silver Lake. Like the previous trip, my route included enough off-trail hiking to add some adventure.

The bus ride took most of the day, with a couple hour wait for a connection in Merced. In Yosemite Valley, I got my permit and something to eat, and as it was getting dark, I found a secluded spot near Happy Isles to put my sleeping bag. I was so excited about starting out that I was up at first light and soon on the trail up out of the valley past Vernal Falls and along Illilouette Creek.

Nevada Falls
Illilouette Creek
At Ottoway Lakes trail junction
My plan had been to camp somewhere along the creek, but I was going strong and it seemed early to stop, so I kept going. I thought I could stop at Merced Pass Lakes, but after wandering around a bit I couldn’t find a lake, and there was no water around. I was very tired by now, but I needed a place with water, so I pushed on to Lower Ottoway Lake. I was in pretty good shape in those days, but after 18 miles and 6000 ft. of climbing with a heavy pack, I was about as worn out as I’ve ever been. My hips were so sore that I was having a hard time walking.

Lower Ottoway Lake and a couple of Synanon people
I soon noticed that there was a group of about a dozen people camped nearby. They were a group from Synanon, a organization that began in the 60’s to help drug addicts, and expanded in the 70’s to help people with any kind of problems. Their approach to group therapy was called “the game”, and it featured an attempt at total honesty with a lot of verbal abuse aimed at each other. A few years before, I had been in therapy for a couple of years, and for a few months, I had gone to Synanon meetings at their Oakland clubhouse, so I knew something about it. In later years, the organization fell apart in very nasty power struggles, but in the mid-70’s they were still doing pretty well. They invited me to join a “game” after dinner, so I did. They were pretty hard on each other, but they took it pretty easy on me as a guest, and I enjoyed their company.

Me with some of the Synanon group at Red Peak Pass
The next morning, I hiked with several of them up to Red Peak Pass, where I said goodbye and continued on my way. Late in the afternoon, I stopped for the day in a meadow along the Triple Peak Fork of the Merced.

Triple Peak Fork
 The following day, I left the trail in the canyon of the Merced and climbed beside cascades over smooth granite to the meadows of the Lyell Fork of the Merced. It was still early in the day, but it was such a beautiful spot, and I was ahead of schedule after my 18-mile first day, so I decided to stay there. There were 360 degree high mountains, but Mount Ansel Adams dominated the view, a sharp pointed well shaped spire at the upper end of the meadows. It is not the highest peak in the area, but it was well chosen as the namesake of the photographer because it is so impressive. I spent the rest of the afternoon wandering around the meadows looking for good photos. As it got dark, I started to feel lonely and worried about bears, but none showed up.

My camp at Lyell Fork of the Merced
Evening at Lyell Fork of the Merced
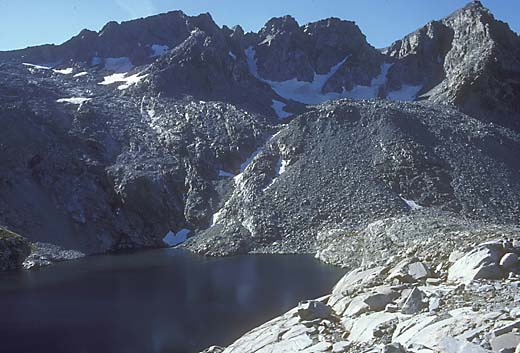
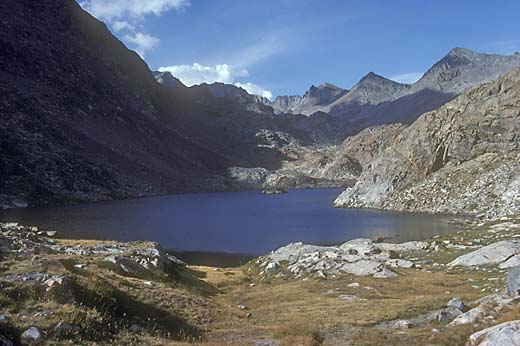
In the morning, I started off again, heading for the big unknown of my planned trip. I was going to try to cross the divide that forms the southeastern border of Yosemite just north of Electra Peak. I chose that spot because on the the topo map the contours looked a bit less dense there, and it looked like it might work. I knew that there was a passable cross country route just south of Foerster Peak, but I had always been intrigued by the basin south of Mt. Lyell, which the map showed as filled with many little lakes. I made it past several of the lakes up to lake 10702, and then headed for the divide. I found that although there were indeed a lot of lakes, it was a pretty sterile environment. I had pictured meadows and trees, but it was all barren rock.

One of the lakes in the basin south of Mount Lyell
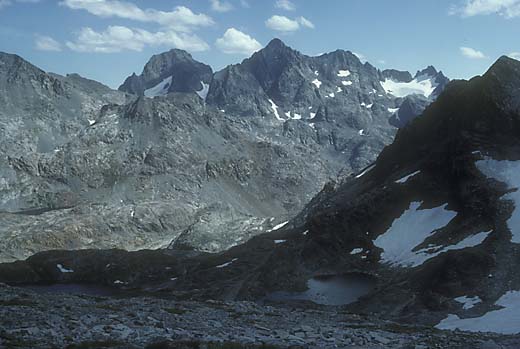
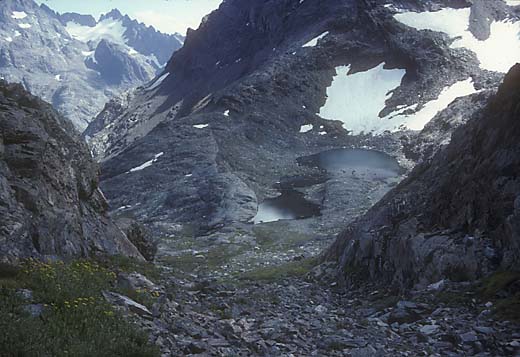
Near the top, there was some steep scree that I had to scramble quickly across to avoid sliding over a cliff edge, but I made it. The other side looked pretty scary with cliffs everywhere, but first I wanted to climb to the top of Electra Peak (12442 ft.) since it was so near. The view was awesome, especially to the southeast where the Ritter Range rose straight out of the deep canyon of the North Fork of the San Joaquin.

On the way down into the canyon of the North Fork of the San Joaquin
Further into the canyon of the North Fork of the San Joaquin
Then I looked for a way down to the east. At first the cliffs had looked like a solid band, but looking more closely, I noticed that at one spot big blocks of talus reached nearly to the top and I could make it down. Then there was a long slope of talus and meadow. As I walked down, I started thinking about the last few days. I began to realize that exciting as it was, this solo backpacking was also pretty lonely, and I missed having someone to talk to. My thoughts were brought back to the present when I found myself on the edge of another band of cliffs that hadn’t been visible from above. Far to the left, they looked a bit less steep, so I made a big detour and continued down. This big upper basin of the North Fork of the San Joaquin was a pretty wild, desolate place with lots of colorful rock and barren lakes. At Twin Island Lakes I looked around, and I could see a flat area a couple hundred feet below in the canyon that looked like a good campsite. I didn’t pick the best way down, and I was pretty tired, so it was a bit of a struggle. There were a few scrawny trees, but it didn’t feel like a very welcoming spot. I did appreciate the late afternoon light on the mountains above making them gold with purple shadows, which reminded me of a Maxfield Parrish painting, but soon it was just another lonely night.

Twin Island Lakes
North Fork of the San Joaquin — 4th night's campsite
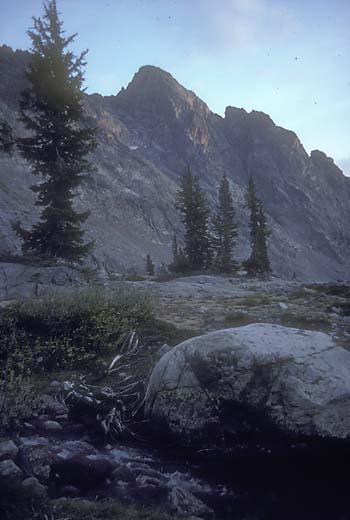
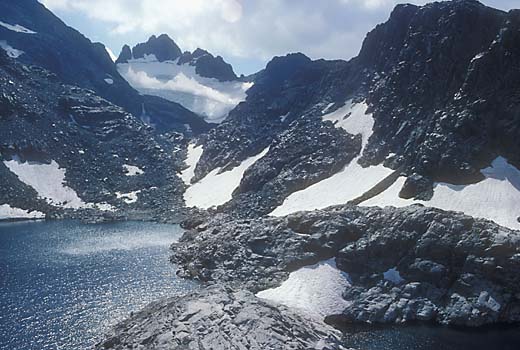
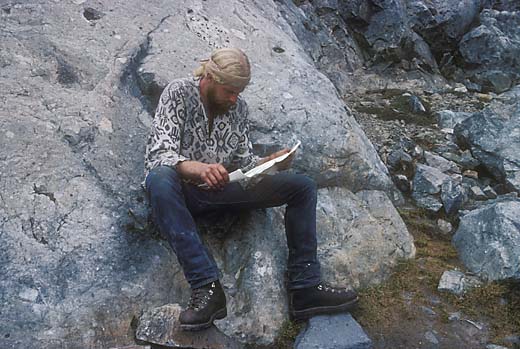
The next morning I was climbing the far side of the canyon, roughly following a cascading stream. It was steep, but there were no real problems. After a long climb I reached Ritter Lakes. It was a beautifully wild scene of bright snow, dark rock and sparkling water. It had been about four days since I had seen another human, but then as I crossed a snowbank, there were footprints. And then, as I was rounding Lake Catherine, there was a guy sitting on a rock. He looked like a larger version of myself -- mid-thirties, long blond hair and beard. He asked if I had a map, and I showed him mine. In an amazing coincidence, he had also started in Yosemite Valley, and was following a similar route. So we hiked together over North Glacier Pass and down to Thousand Island Lake, where we camped together. We talked a lot about our similar experiences and it was nice to finally have some company.

On the way up to Ritter Lakes
Ritter Lakes
Fellow Hiker at Lake Catherine
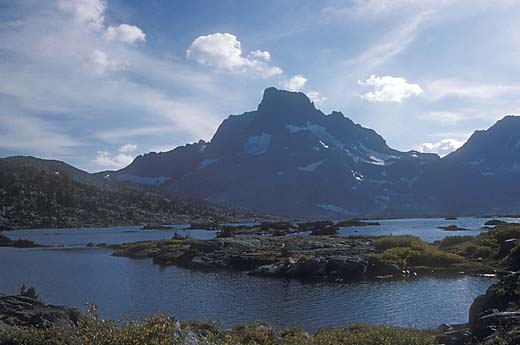
Thousand Island Lake
descending from Agnew Pass
The next morning, we made the long descent to Silver Lake, where we said goodbye, and he hitch-hiked away. I was a day early for pick-up by mom and dad, so I just hung around the general store for a few hours until evening, and then looked around for a suitable place to sleep. I found it in a clump of junipers a quarter mile or so above the road where I figured no one would bother me. The next day, mom and dad showed up as planned, and my trip was over.

It was a great trip and it satisfied my appetite for mountain adventure for quite a while. It also taught me that although solo backpacking can be fun, it was not something that I wanted to do much of again. I had always thought of myself as something of a loner, but I realized that mountain adventure was a lot more fun with friends along. In following years, I did many camping and backpacking trips with Maureen and the boys, and with other friends, and I found that although they were not as adventurous as my solo trips, they were a lot more fun.

Past Sierra Adventures 1

Lately I haven't been doing much hiking in new places to add to this blog, so I thought I would share some old memories and photos of wilderness trips of years past. Though they are not a big deal compared with the hiking and climbing that lots of people are doing these days, they were pretty exciting to me. After the years of backpacking trips with the scouts, I wondered about the possibility of backpacking by myself. Mostly I wondered whether my mind could take being alone in the wilderness for days without going nuts. I thought that maybe I could.

In 1973, I was married and we had a kid on the way, and I felt like I was soon going to be tied down forever and it was my last chance for some mountain adventure, so I planned a 3-day solo trip in the Bridgeport area. I was going to start at Twin Lakes, and do a loop around Sawtooth Ridge. It would require several miles of cross-country hiking including two high passes which were questionable. In those days, there wasn’t much information available about off-trail routes, and I had practically no climbing experience, so I wasn’t sure if my plan would work.

On a mid-July afternoon, I arived at Twin Lakes and started up the Horse Creek trail. After a mile or two, I left the trail and continued on a fairly good use-trail which led up a long talus slope. I stopped to rest in a beautiful little meadow at about 9200 ft. elevation, unpacked and walked around taking photos as the sun was setting.

View down Horse Creek from the beginning of the talus slope and a passing hiker
Meadow near first night's camp
Last stretch to Horse Creek Pass
The next morning I continued up the canyon up long talus slopes and snowfields to Horse Creek Pass at about 10700 ft. It wasn’t too hard until the last bit where the snow was steep, which made me nervous, and I scrambled around it on some steep scree. About a half mile across the head of Spiller Creek I could see Matterhorn Pass, and it looked like a problem. There was about 100 ft. of nearly vertical granite below the saddle. I began trying to climb a crack near the middle of the face, but it was too difficult and I realized how foolish it was to take chances being alone in a remote place.

Matterhorn Pass from Spiller Creek side
At the top of Matterhorn Pass
I looked around and noticed a little gully going up far to the left that might work. Luckily it did, with just a bit of scary exposure near the top. The far side was steep, but not bad, and then there was a long snowfield down into Matterhorn Canyon. Then I was back on a trail over Burro Pass. I took a long lunch break in a meadow, and then one more pass to cross, Mule Pass. There was a lot of snow, and I lost the trail several times, and very tired by now, I finally got down to Crown Lake.

Looking back to the east from near Mule Pass
descending toward Crown Lake
As I passed the lake, I stopped to talk to a couple of young guys camped there, and they invited me to come back later and smoke a joint with them. I found a campsite a bit below them, and later went back to take them up on their offer. Three of us were crowded into a tiny tent, smoking. Then one of them got out a butane stove and lit it. A flame shot out of it about 3 ft. long, and we all totally freaked out.

Back at my camp, stoned and still a bit freaked, I suddenly wondered where my wallet was. I dumped everything out of my pack and searched everywhere, but didn’t find it. I was thinking that it must have fallen out of my pack back at my lunch stop, but that was way too far to go back for it. So I went to sleep very bummed about it.

Juniper on the way down from Crown Lake
The next morning, I looked once more, and the wallet was right in the side pocket of the pack where I had put it. Maybe getting stoned in the wilderness wasn’t such a good idea. From there it was a long but easy downhill hike back to Twin Lakes. It had been a fun, successful trip and I didn’t mind being alone, although it was only a couple of nights.

Wednesday, July 4, 2018

Huckleberry 7-2-18


I had been thinking that it would be nice to do some walking in some shady woods, and the Huckleberry Preserve in the Oakland hills would be a good place for it. So on a foggy monday morning I set off on Redwood Road from Castro Valley. As I drove I remembered that along the way I would pass a trail that I had never tried, the Big Bear Loop Trail, so I stopped at the Big Bear Staging Area. The sign on the only visible trail said "to McDonald Staging Area". That's not where I wanted to go, but I followed it for a short distance and found the Big Bear Trail branching to the right. It was a steep climb up into a small ravine until the trail bent to the right and traversed the hillside through lush vegetation. After passing a water tank, the trail descended back down to Redwood Road a short distance above the parking area.

I drove on up to Skyline and followed it up to the Skyline Gate of Redwood Park. This is a very popular spot, especially with dog walkers, but luckily there were still a few places to park. I walked along with several strings of dogs on the East Ridge Trail until the Skyline Trail branched left. Going over a small hill, I saw some beautiful magenta flowers on the trail side. I don't know much about flowers, and I thought these looked like some kind of orchids, imagining that I had found something exotic. Later, at home, I showed a photo to Maureen and she told me that they were sweet peas. Not so exotic but pretty all the same. My trail crossed Pinehurst Road, and soon came to a fork. I turned right, heading lower into the canyon. After winding in and out of a couple of ravines, I came to a trail branching left heading steeply up the hillside, and I followed it. It was steep enough that in many places it climbed wooden steps. At the top, I turned left again heading back to complete my loop. All along these trails I got my fill of shady woods and lush vegetation. In many places the trail sides are walls of huckleberrys way over my head.

So I got what I was looking for -- a nice walk in beautiful woods, not too long but enough to feel like I had gotten some exercise.

Big Bear Trail:  0.5 miles, 150 ft. climb
Redwood and Huckleberry:  2.2 miles, 380 ft. climb